
|
Add/Review Content
Pre-defined Cancer Genes
When you select to add content using the Select Targets from Pre-defined Cancer Genes option, you first select the cancer genes that you want to capture (screen 1), then you specify the types of variants you want to be able to detect in those genes (screen 2). Finally, you review your targets and submit the probe selection job to SureDesign (screen 3). The program's algorithms select the probes. You receive an e-mail from Agilent SureDesign notifying you when your probe selection job is complete and the results are available for you to review.
The screen displays the names of the cancer genes from Agilent's predetermined list.
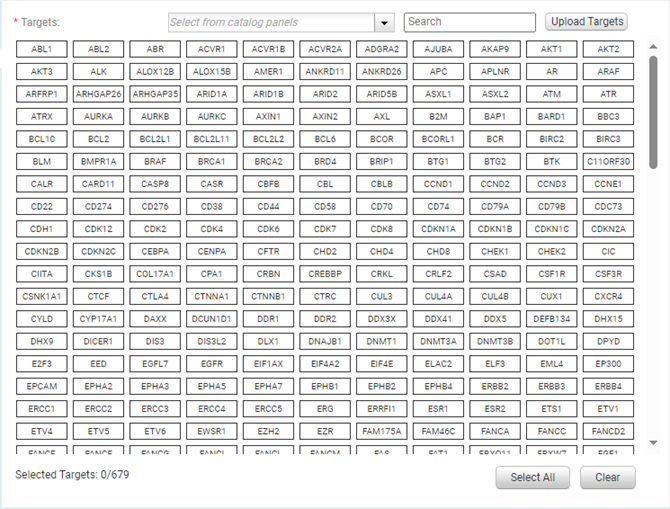
Click on individual gene names to select them for the design. Selected genes are highlighted in blue. To select all genes, click Select All.
To de-select a gene, click on it again so that it is no longer highlighted. Or, click Clear to de-select all selected genes.
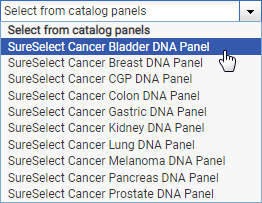
To quickly select all of the cancer genes that are part of a catalog SureSelect Cancer CGP panel, expand the Select from catalog panels drop-down list at the top of the screen and select the list of interest. Additional panels may be added to the drop-down list as they become available from Agilent.
The text file containing the targets must have one gene name per line and have file extension txt.
The bottom of the screen indicates the number of targets selected. If any of the genes in the uploaded file were not found by SureDesign, the screen also lists the number of Not Found Targets.
To search for a gene, type the gene name into the Search field at the top of the screen. Genes containing the search term are highlighted. Click highlighted genes to select them.
Click Next to continue to Screen 2.
This screen provides check boxes for selecting which type of variants you want to capture. Each target gene that you selected on Screen 1 is listed in the Gene column. If you selected your target genes by selecting a catalog SureSelect Cancer CGP panel, then the default variant type selections are those defined by the catalog panel.
Mark the check boxes for the variant types you want to detect. Clear check boxes for any variant types you do not need to detect.
For some genes, probes for detection of CNV and/or translocation variants may not be available. In those case, no check box is listed in the CNV or Translocation column. To detect a variant type for which there is no check box, use the method for adding content called Enter Custom Targets/Regions.
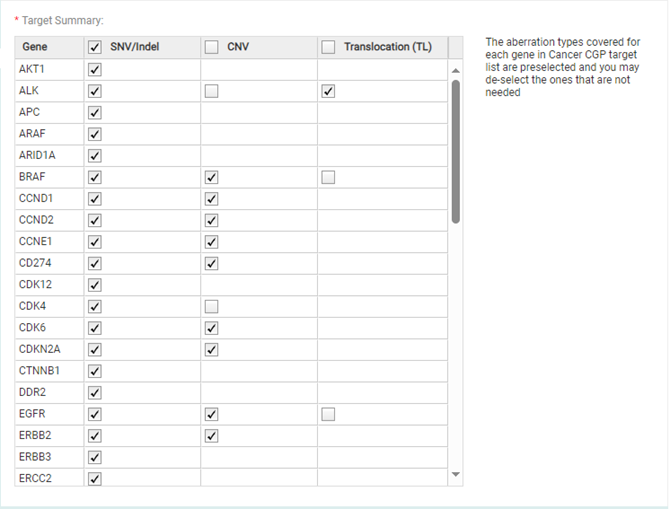
The three types of variants are described below.
· SNV/Indel - Single nucleotide variants and small insertions and deletions (indels) in exonic regions
· CNV - Copy number variants
· Translocation (TL)
Click Next to advance to Screen 3.
This screen provides a chance for you to review the number of target genes for each variant type. Review the Target Summary and Target Details before you click Begin Probe Selection.
To change the name assigned to the new probegroup, type the desired name into the Probegroup Name field at the top of the screen.
NOTE To perform a careful review of the individual regions, click View targets in UCSC to open the UCSC Genome Browser and see the genomic locations of the regions identified by SureDesign.
To submit the design for probe selection:
Click Begin
Probe Selection.
A message box opens indicating the e-mail address where Agilent will
contact you when the probe selection job is complete. If desired,
you can enter additional e-mail addresses into the provided field.
Click OK
in the notification message to submit the design to SureDesign.
Your submission is placed in the SureDesign job queue to await probe
selection.
The wizard takes you to the Add/Review
Content screen. The new probegroup appears in the Probegroup Summary
table. The # Targets column of the table lists Processing
until the probe selection job is complete. Click the refresh icon
![]() to see updates to this column.
to see updates to this column.
You receive an e-mail from Agilent SureDesign notifying you when your
job is complete. In order to finalize the design, you must wait until
your probe selection job is complete.